There’s something undeniably magical about a fresh waffle. That perfect balance of crispy exterior and fluffy interior, ready to soak up syrup or cradle your favorite toppings, is a true breakfast delight. For years, home cooks and professional chefs alike have sought the ideal tool to achieve this culinary perfection. Enter the Krups Waffle Maker, a name synonymous with precision engineering and consistent results in the world of kitchen appliances. If you’re looking to elevate your breakfast game or simply want a reliable machine that delivers deliciousness every time, understanding the ins and outs of a Krups Waffle Maker is your first step.
Why Choose a Krups Waffle Maker? Unpacking Its Core Appeal
Krups has built a solid reputation over decades for crafting high-quality kitchen tools that combine thoughtful design with practical functionality. When it comes to waffle makers, they bring that same dedication to the table, making them a popular choice for families and waffle aficionados. From the sleek stainless steel finishes to their intuitive features, Krups waffle makers are designed to seamlessly integrate into your morning routine, transforming ordinary batter into extraordinary waffles. Many users appreciate the robust build and the promise of a superior waffle-making experience.
Diving Deep: Key Features of Krups Waffle Makers
What exactly sets a Krups Waffle Maker apart? It’s often a combination of thoughtful design elements and user-friendly technology that makes a real difference in your kitchen.
The Signature 4-Slice Belgian Design
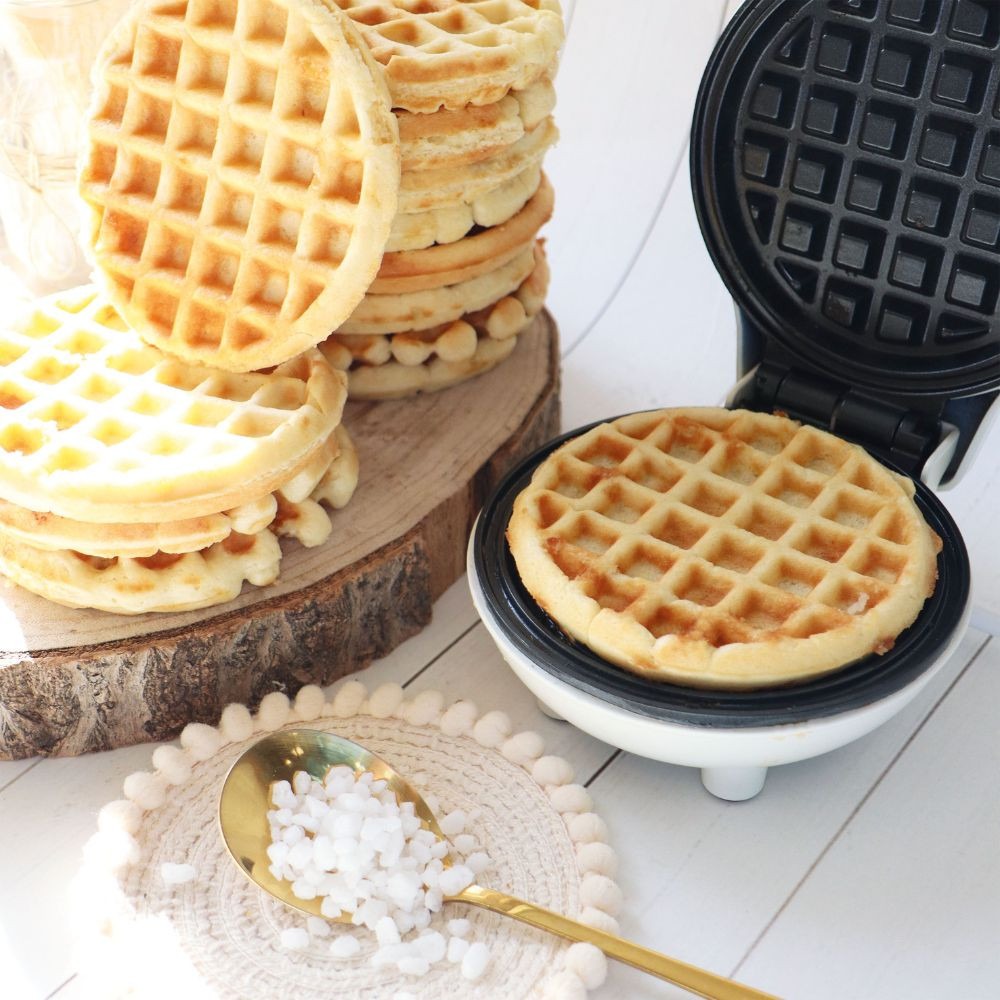
Most popular Krups Waffle Maker models, such as the widely praised GQ502D51, excel at crafting authentic Belgian-style waffles. This typically means deep pockets perfect for holding a generous amount of syrup, fruit, or whipped cream. The ability to bake up to four square Belgian waffles at once is a huge plus, especially for busy mornings or when feeding a crowd. This capacity ensures that everyone gets a warm, fresh waffle without a long wait.
Precision Browning: Finding Your Perfect Crisp
One of the most appreciated features of a Krups Waffle Maker is the adjustable browning control. With five distinct browning levels, you can customize your waffles from a light, golden hue to a deep, dark crispness, catering to every individual preference. This level of control is crucial for achieving that personalized touch, ensuring your waffles are exactly how you like them, every single time.
Removable Plates: A Game-Changer for Cleanup
Let’s be honest, cleaning a waffle maker can sometimes be a sticky affair. This is where many Krups Waffle Maker models truly shine. Their removable, die-cast non-stick plates are a revelation for easy cleanup. After cooling, these plates can often be detached and, for most models, are even dishwasher-safe, though handwashing is often recommended to preserve the non-stick coating long-term. This feature transforms post-waffle cleanup from a chore into a breeze, allowing you to spend more time enjoying your meal and less time scrubbing.
Intuitive Indicators: Beeps, Lights, and No Guesses
A common anxiety for new waffle makers is knowing exactly when the iron is ready and when the waffles are perfectly cooked. Krups Waffle Makers eliminate this guesswork with their red and green indicator lights and an audible “ready” beep. The red light signals that the unit is on and heating, while the green light and beep alert you when it’s reached the ideal temperature for baking and when your waffles are done. It’s a small detail that provides significant convenience and consistent results.
Thoughtful Storage Solutions
Kitchen counter space is precious, and Krups understands that. Many Krups Waffle Maker designs incorporate features like cord wraps and handle locks, allowing for convenient vertical storage. This compact design makes it easy to tuck away your waffle maker in a cabinet when not in use, keeping your countertops clutter-free.
Types of Waffle Makers: Where Does Krups Fit In?
The world of waffle makers is diverse, with options ranging from classic American styles to specialized mini versions. A Krups Waffle Maker predominantly falls into the Belgian waffle maker category. Belgian waffles are known for their thicker, deeper pockets compared to their thinner, crispier American counterparts. While some brands offer rotating or vertical designs, Krups typically offers traditional fixed-plate models that excel at creating consistently thick and airy Belgian waffles. They focus on delivering a robust, family-sized appliance rather than novelty shapes or single-serve options.
What to Consider Before You Buy Your Krups Waffle Maker
Choosing the right appliance is always about matching features to your needs. Here’s what to keep in mind when selecting a Krups Waffle Maker:
- Power (Wattage): Higher wattage (like the 1200W found in many Krups models) generally means faster preheating and more consistent cooking temperatures.
- Material: Most Krups models boast elegant stainless steel housing, which not only looks great but also contributes to durability and ease of exterior cleaning.
- Budget: While Krups offers premium quality, their waffle makers are often positioned as an excellent value, providing high-end features without the top-tier price tag of some professional models.
- Desired Waffle Style: If thick, fluffy Belgian waffles are your dream, a Krups Waffle Maker is an excellent choice. If you prefer thin, crispy American-style waffles, you might explore other specialized models.
- Counter Space: Despite smart storage solutions, a 4-slice Belgian waffle maker does require some counter footprint during use, so consider your kitchen layout.
First Impressions and First Bites: How to Use Your Krups Waffle Maker
Getting started with your new Krups Waffle Maker is a straightforward process, but a few initial steps and tips will ensure your waffles turn out perfectly every time.
Initial Setup: The Unboxing Experience
Upon unboxing your Krups Waffle Maker, remove all packaging and stickers. It’s a good practice to wipe down the housing and plates with a damp cloth to remove any manufacturing residue. For the very first use, you might notice a slight odor or a bit of smoke; this is completely normal and typically dissipates quickly as the non-stick coating cures.
Preheating Perfection
Before adding any batter, always preheat your Krups Waffle Maker in the closed position. Plug it in, and the red “ON” indicator light will illuminate. Select your desired browning level using the control dial (from 1 for lightest to 5 for darkest). Once the waffle maker reaches the set temperature, the green “READY” light will turn on, often accompanied by an audible beep. This signal is your cue that it’s prime time for waffle creation.
The Art of Pouring Batter
Lift the lid gently. Pour your waffle batter onto the bottom plate, being careful not to overfill. A good rule of thumb is to fill the grids just enough to cover the surface without overflowing the edges. Close the lid carefully, allowing the steam release system to work its magic. Resist the urge to press down hard on the lid, as this can affect the waffle’s rise.
Knowing When Your Waffles Are Ready
Your Krups Waffle Maker will typically signal when your waffles are done cooking, either by the green “READY” light illuminating again or another audible beep. This usually takes between 4 to 8 minutes, depending on your selected browning level and batter consistency. Once done, gently lift the lid and remove your perfectly cooked waffles using non-metal utensils to protect the non-stick coating.
Tips for Perfect Waffles Every Time
- Greasing (Even Non-Stick): While Krups Waffle Makers feature non-stick plates, a light application of cooking spray or oil (butter for flavor!) before each use can further enhance non-stick performance and give your waffles a lovely golden crust.
- Don’t Overfill: This is a common mistake. Too much batter leads to messy overflows. Start with a conservative amount and adjust as needed.
- Resist Peeking: Opening the lid frequently during cooking releases heat, prolonging the cooking time and potentially affecting the waffle’s texture. Trust the indicator lights!
- Let Your Batter Rest: Many waffle recipes benefit from allowing the batter to rest for 15-30 minutes, or even an hour, before cooking. This allows the flour to fully hydrate, resulting in a lighter, fluffier waffle.
Beyond Breakfast: Delicious Recipes for Your Krups Waffle Maker
Your Krups Waffle Maker is a versatile tool for more than just traditional breakfast. Here are a couple of ideas to get you started:
Basic Belgian Waffle Recipe
- Ingredients:
- 2 cups all-purpose flour
- 2 tbsp sugar
- 1 tbsp baking powder
- 1/2 tsp salt
- 2 large eggs, separated
- 1 3/4 cups milk (for softer waffles) or 1 1/2 cups milk + 1/4 cup sparkling water (for crunchier)
- 1/2 cup melted unsalted butter or vegetable oil
- 1 tsp vanilla extract
- Instructions:
- In a large bowl, whisk together flour, sugar, baking powder, and salt.
- In a separate bowl, whisk egg yolks, milk, melted butter/oil, and vanilla.
- Pour the wet ingredients into the dry ingredients and mix until just combined (a few lumps are okay!). Do not overmix.
- In a clean bowl, whisk egg whites until stiff peaks form. Gently fold the egg whites into the batter.
- Preheat your Krups Waffle Maker to your desired browning level.
- Pour about 1/2 cup of batter per waffle square onto the preheated plates.
- Cook until the “ready” indicator sounds. Serve immediately with your favorite toppings.
Savory Waffles & Gluten-Free Adaptations
Think outside the syrup bottle! Use your Krups Waffle Maker to create savory delights. Try adding shredded cheese, chopped herbs, or even cooked bacon bits to your batter for a savory breakfast or brunch option. For those with dietary restrictions, gluten-free flour blends can be used in most waffle recipes with excellent results. Just ensure your chosen blend is suitable for baking and adjust liquid content if the batter seems too thick or thin.
Keeping It Clean: Maintaining Your Krups Waffle Maker for Years
Proper cleaning and maintenance are key to extending the life of your Krups Waffle Maker and ensuring its continued performance.
Cleaning Removable Plates
The removable plates are a huge advantage here. Once the waffle maker has cooled completely, detach the plates. While many are advertised as dishwasher safe, handwashing with warm, soapy water and a soft sponge is often recommended by experts, including myself, to protect the non-stick coating from harsh dishwasher detergents and high heat, which can cause premature wear or oxidation. Rinse thoroughly and dry completely before reattaching or storing.
Wiping Down the Base
For the main unit, ensure it is unplugged and fully cooled. Wipe the exterior and any non-removable interior parts with a damp cloth or sponge. For stubborn spills, a slightly damp paper towel can work wonders.
Essential Do’s and Don’ts
- DO clean your Krups Waffle Maker after every use, even if it’s just a quick wipe-down.
- DO NOT immerse the main unit or its power cord in water.
- DO NOT use abrasive cleaners, steel wool, or harsh scrubbing pads on any part of the waffle maker, especially the non-stick plates, as this can damage the finish.
- DO remove stubborn, baked-on batter by pouring a few drops of cooking oil onto it and letting it sit for a few minutes to soften before wiping away.
Troubleshooting Common Waffle Maker Woes
Even with the best appliances, sometimes things don’t go exactly as planned. Here are some common issues and their quick fixes for your Krups Waffle Maker.
Waffles Sticking: The Non-Stick Nuisance
If your waffles are sticking, despite the non-stick coating, consider these factors:
- Insufficient Fat: Even non-stick plates benefit from a light greasing before each batch.
- Too Much Sugar: High sugar content in batter can make waffles more prone to sticking.
- Improper Cleaning: Residue buildup from previous uses can compromise the non-stick surface. Ensure plates are thoroughly cleaned.
- Not Preheated Enough: Always wait for the “ready” light/beep before adding batter.
Uneven Browning
If your waffles are browning inconsistently:
- Uneven Batter Distribution: Ensure batter is spread evenly across the plates.
- Opening Lid Too Soon: As mentioned, releasing heat during cooking can lead to uneven results. Trust the browning settings and indicator.
- Old Batter: Sometimes, stale batter can contribute to poor cooking performance.
The Mystery of the Malfunctioning Beeper
While rare, some users have reported issues with the audible “ready” beep malfunctioning over time, possibly due to steam exposure. If this happens and your unit is under warranty, contact Krups customer support. Otherwise, rely on the indicator lights and experiment with timing for consistent results.
Expert Insight: A WaffleMasterPro Perspective
“In my fifteen years observing the evolution of waffle makers, the Krups Waffle Maker consistently stands out for its robust performance and user-centric design,” says Eleanor Vance, lead product evaluator for WaffleMasterPro. “The removable, dishwasher-safe plates are a feature I wish every manufacturer adopted, significantly enhancing the everyday usability. While some units have faced minor critiques on long-term electronic components, the core waffle-making capability and the quality of the Belgian waffles produced are consistently top-tier, making it a reliable workhorse for any kitchen.”
Frequently Asked Questions (FAQ)
Q1: Are Krups waffle maker plates truly dishwasher safe?
While many Krups Waffle Maker models advertise dishwasher-safe plates, for optimal longevity of the non-stick coating, handwashing with warm, soapy water is often recommended.
Q2: How do I know when my Krups Waffle Maker is preheated and ready?
Your Krups Waffle Maker typically features a green “READY” indicator light and an audible beep that signals when the appliance has reached its optimal cooking temperature.
Q3: Can I make different types of waffles in a Krups Waffle Maker?
Krups waffle makers are primarily designed for Belgian-style waffles with deep pockets. While you can use various batters, the shape and depth are optimized for the Belgian style.
Q4: My waffles are sticking to the Krups Waffle Maker, what should I do?
Ensure you are lightly greasing the plates before each batch, even if they are non-stick. Also, check that your batter doesn’t contain excessive sugar and that the plates are thoroughly cleaned after each use.
Q5: How do I clean burned-on batter from my Krups Waffle Maker?
Allow the unit to cool slightly, then unplug it. Pour a few drops of cooking oil onto the burned-on batter and let it sit for a few minutes to soften. Then, gently wipe it away with a damp cloth or paper towel. Avoid harsh scrubbing.
Q6: What is the average cooking time for waffles in a Krups Waffle Maker?
Cooking time can vary based on your desired browning level and batter consistency, but generally, waffles cook in about 4 to 8 minutes, indicated by the “ready” light or beep.
The Final Crunch: Embracing Your Krups Waffle Maker Journey
The Krups Waffle Maker is more than just an appliance; it’s a gateway to creating delightful culinary experiences right in your own kitchen. With its intuitive controls, robust design, and excellent performance in crafting delicious Belgian waffles, it’s an investment that pays dividends in crispy, fluffy goodness. By understanding its features, following proper usage guidelines, and committing to simple cleaning routines, your Krups Waffle Maker will be a cherished companion for countless breakfasts, brunches, and anytime treats. So go ahead, experiment with new recipes, share the joy of homemade waffles, and let your Krups Waffle Maker become the heart of your morning routine.